Sunday, September 22, 2013

The "Butt-Munch" Baitfish

     Here's another baitfish streamer I put together last night at the vise. I had planned on tying up a few of Kelly Galloups Butt Monkeys but as I got going  I decided to add a few things, subtract a few, and substitute some materials. This is what I ended up with so I'm calling it the "Butt-Munch" Baitfish!
     Tying this pattern last night reminded me of something many tiers may overlook. The flies we tie, from streamers to tiny Trout nymphs, look very different when wet in the water than they do dry clamped in our vise. It just so happened I was testing out some "Walk The Dog" style topwater flies in my bathtub so I decided to get this guy wet to see how it would look to the fish. It looked great! 
     The next time you tie something it doesn't hurt to test it out in the bathtub, sink, or if your lucky rig up your rod and make a few casts into your swimming pool! Fully understanding your materials and their individual properties is paramount to simply knowing how to attach them to a hook. Furthermore, how your flies perform in the water in front of a hungry fish is what matters, not just how they look to us under the artificial light at the tying bench.

Hook: Gamakatsu SP11-3L3H sz. 2
Thread: White Uni 6/0
Tail: White Marabou over Pearl Ice Dub
Wing: Magnum Cut Grey Rabbit Zonker
Body: Pearl Estaz
Hackle: White Schlappen
Eyes: Painted Lead Dumbell
Head: Grey Senyo's Laser Dub


Saturday, September 21, 2013

The "Lay Z" Baitfish

     What do you get when you add Senyo's Laser Dub to a Zonker? You get the "Lay Z" Baitfish, just in time for the Fall Feeding Frenzy!
      In the Fall Bass as well as Trout put on the feed bag. Bass start targeting baitfish like Shad in Lakes and Reservoirs and Bluegill in Ponds in preparation for the Winter ahead. Trout on the other hand, especially Browns, hammer all types of big Streamers and Nymphs in preparation for spawning.
     The Zonker is known as a pattern for big fish and the addition of a Laser Dub head just makes it that much more effective. With the array of colors available in Zonker Strips, Mylar Tubing, and Laser Dub it's possible to come up with a pattern that matches the forage in your waters. The pattern shown here is just a generic "Minnow" but the possibilities are endless as far as what you can come up with. Aside from that, you can also play around with the weight of the fly quite a bit. You can hide a lot of lead inside the Mylar Tubing or even a Glass Rattle or both. For a more weedless fly use a Tungsten Scud Body from Hareline to flip the shank over. 
     There are many ways to fish guy from swinging it across current in rivers and streams to manipulating it with a jerk strip retrieve in stillwaters. Play around with different retrieves until you find one that works. Even though the weather is cooling off the Streamer fishing is heating up!


Hook: Gamakatsu B10S sz.2
Thread: White Uni 6/0
Wing: Magnum Cut Grey Rabbit Zonker Strip
Underbody: Tapered Lead Foil
Body: Large Silver Mylar Tubing
Head: Grey Senyo's Laser Dub
Eyes: Wapsi Stick-On Holographic Silver

Monday, September 9, 2013

Pop Art (Painting Bass Poppers)


     Constructing Bass Poppers occupies a special place in my Fly Tying repertoire. My readers might not know that aside from being a Fly Tier and Fisherman I've been an artist since I was old enough to grasp a brush. Making poppers gives me the opportunity to blend my interests and the vicious topwater strikes from a hungry Bass attacking the finished bugs are just an added bonus. 
     As with a lot of things, making your own Bass Bugs can be as easy or as complicated and time consuming as you want it to be. Back in the day an angler who wanted a Bass Bug would have to carve and shape it from scratch out of cork or balsa as well as paint it. Today however we have things much easier although many tiers still prefer to make them from scratch, not only as a nod to the past but for the freedom it presents to create something unique and personalized. 
     If your looking to make a bunch up quick or are just starting out you can't go wrong with the "Perfect Popper" kits from Wapsi. These can be purchased with or without hooks and also include an instructions sheet for assembling them. There are also tons of "How-To's" on the Web as well as videos on YouTube to get you on the right track.
      The Poppers shown here are from the Wapsi kits. I purchase mine with hooks but have found that the popper bodies really benefit from a hook that is 1x larger than what is on the pack. I really like the Gamakatsu B10S. If you do decide to use the hooks that come in the pack I recommend opening up the hook gap slightly with a pair of pliers. 
     Once you have the bodies attached to the hooks it's time to paint. Before you paint however use fine grit sandpaper or an Emory board to get rid of any mold lines. If you don't they can show up in a big way once color is applied. Also, if you are using adhesive stick-on eyes it's a good idea to apply them before you paint then mask them with tape, it can be difficult for them to adhere properly on top of the paint. 
     Now for the fun part, painting! I paint mine with spraypaint but am looking forward to trying the Copic Airbrush system. Some paint theirs with acrylic craft paint while others use plain ol' permanent markers like Sharpies and Prismacolors. Each have their pro's and con's so it's best to experiment. I prefer spraypaint for it's ease of use and the myriad of different effects you can create with stencils and the paint itself. For example, the crosshatch pattern on some of the poppers below was created by using DryWall tape as a stencil. On others the plastic net bags that fruit comes in were used as a stencil or stamped into the wet paint for a different effect. Go crazy and have fun!


Tuesday, August 20, 2013

The "Electric Slider" Frog

     This adaptation of the classic Gartside Gurgler has been a great fly for me this Summer. Anyone who chases Bass on top with a fly rod should be familiar with Jack Gartsides legendary fly which is arguably the most effective surface fly ever created. As with most classic flies of this caliber the imitations are endless and anglers from freshwater to salt all have a version they like to fish. This is my version   and here's how I like to fish it. Much like "Target Shooting" with a streamer I like to cast it as tight to cover as I can and strip it back like my life (or the poor little frog's life in this case) depended on it! The wire weedguard allows me to cast right into brush piles, fallen timber, pads, grass, anywhere bass like to hide and ambush fleeing prey. Another great way to fish it is to cast it right onto the bank then hop it off. If a fish doesn't strike after it plops down strip it back and pause it every so often to give any fish tracking it a chance to pounce. Mix it up to find the presentation that works and be prepared for some vicious strikes!

Hook: 3/0 Gamakatsu Weedless Worm 
Thread: Chartreuse UTC 140
Legs: Olive Bucktail over Chartreuse split and posted to form the legs
Underbody: UV Chartreuse Micro Polar Chenille
Overbody: 2mm Chartreuse Craft Foam (I like to dress up the top with permanent markers)
Eyes: Doll Eyes


Wednesday, August 14, 2013

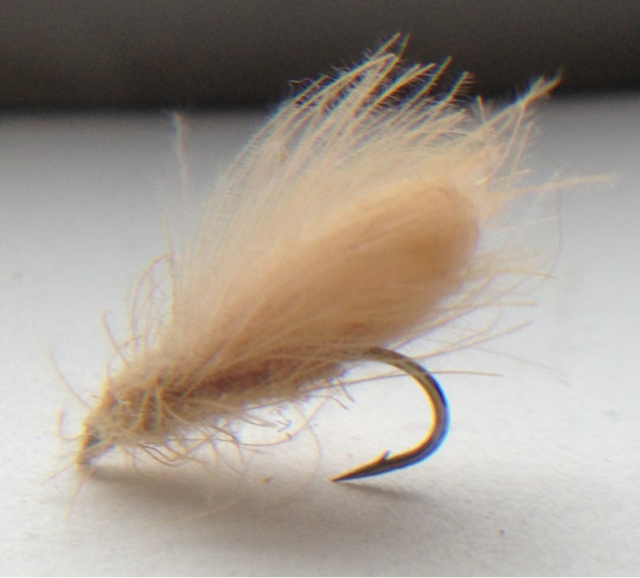
Mr. Bubble CDC Caddis

     This Caddis pattern has been sitting on my tying desk for a while now. I wasn't sure what to do with it honestly. It wasn't until recently when I was getting my gear together for a trip to the Gunpowder River that I decided what the hell and stuck it in my box. I'm sure glad I did. 
     We arrived at the river and were greeted by an angler who had just finished fishing. He recommended olive streamers so I tied on an olive Bastard Bugger and made my way down the trail to the boulder pools above Falls Road. I nicked a few fish including one hefty brown that took me into the white water and got loose. The sub-surface bite slowed as the sun came out so we made our way upstream where I was greeted by another angler who was confronted with a unique situation. He explained that the fish were taking Caddis despite the fact there were none coming off or any seen buzzing around. He was taking fish on a standard Elk Hair Caddis and I remembered the bubble wing Caddis I had brought along. So to make a long story short I plucked it out from my box and after a liberal application of Dry Shake went on to catch fish for the rest of the day. Tie a few up, they only require two materials if you count the thread, they float like a buoy, are easy to see, and as Oliver Edwards would say "They work a treat!"

Hook: Tiemco 100 sz. 12-18
Thread: Uni 8/0 in Tan
Wing: 3 pieces of CDC, One light colored piece for the underwing and two darker pieces tied "Bubble Wing" style
Abdomen: Dubbed CDC
Thorax: CDC, touch dubbed, spun in a split thread dubbing loop, or wound as a hackle


Underside, Über Buggy

Monday, August 12, 2013

BBW Bass Fly

     Along with the weather the Bass fishing has been heating up these past few weeks. I was wondering a few days ago why I haven't been tying a whole lot lately, then I remembered. I've been fishing! I live within ten minutes of 5 top notch ponds and all have been producing quality fish. However, due to the weather the shallow water opportunities of spring have passed. Local anglers of all disciplines have had to fish deeper to locate fish trying to beat the heat.
      The BBW or "Braided Body Worm" shown here is one pattern I've had success with recently. The tail of the worm is created by braiding two pieces of standard chenille with a length of Estaz or crystal chenille. It also features a bright foam tip that suspends the end of the tail when jigged or hopped along the bottom. Tie some up and experiment with different colors of chenille to match the water conditions in your area.

Hook: 3/0 Gamakatsu Weedless Worm Hook
Thread: Olive UTC 140
Weight: Lead Wire and Black Lead Dumbell Eyes
Tail/Body: 2 Strands standard Olive Chenille and 1 strand Medium Olive Crystal Chenille braided "Pony-Tail" style
Worm Tip: 2mm Craft Foam
Collar: Olive Schlappen
Head: Medium Olive Crystal Chenille


Tuesday, July 16, 2013

Parachute Antics

I guess I'm lucky in that the first Trout I caught on a fly rod I caught on a Dryfly. Most novice anglers might take their first fish with a nymph on an indicator rig or by stripping a black Wooly Bugger but not me, I was blessed with a slow and deliberate rise. Unfortunately however, I can't say I was drifting Duns over furiously feeding fish in the middle of an epic hatch of Sulphurs on a famed eastern Spring Creek. It wasn't such a legendary event. I was fishing with my Father on Morgan Run in Carroll County Md. one Fall afternoon. Anyone familiar with this stream knows there are several pools conveniently located near the parking areas that get absolutely hammered. I was fishing one such spot with little hope of catching anything. No rises anywhere or even fish so it seemed but I kept fishing if only for the "on the water" practice. After trying all the old favorites like Adams and Elk Hair Caddis I tied on a Parachute Ant and cast it above a drowned tree. I followed the bright green post on that fly like a hawk as it approached the submerged timber and as it passed over a log it happened! A silvery head appeared and grabbed the fly, I waited until I felt the fish and set the hook! A minute later I had my first Fly caught Trout in the net and a smile on my face. Since then I always carry a few Parachute Ants with me. I've caught trout practically every month of the year on them regardless if their "in season" or not. Also, the next time your having trouble "Matching the Hatch" try "Un-Matching" it with an Ant pattern and you might be surprised. Furthermore don't be afraid to try larger sizes. There's just something about Ants that Trout love. 

Hook: Tiemco 100 sz. 12-22
Thread: Black Uni 8/0
Body Segments: Black Superfine Dubbing
Post: Hi-Viz Poly Yarn
Hackle: Black


Wednesday, July 10, 2013

The Fly Fisherman's Senko Worm

It could be argued that Fly Fisherman are at a disadvantage to Spin Fisherman when it comes to lure selection for Bass fishing. Fly anglers fishing for Bass might feel like they only have a few options on the water as opposed to a gear angler who has a tackle box full of them. Fly Fisherman can either fish a popper or surface slider and if that fails to produce we're left with fishing streamers and that's pretty much it right? Wrong! Unlike conventional anglers who are limited to what's on the shelves at the tackle shop Fly Fisherman and tiers are limited only by their materials which can be used to create all manner of effective flies. For a very long time the plastic worm or "Senko" worm has been one of if not the most effective lures a conventional angler could throw. This fly is the Fly Anglers version of this timeless bait. There are several other incarnations of the plastic worm for Fly Fisherman such as the "Gulley Worm" and "Foam Tail Super Worm." So the next time your at the pond or on the lake don't get jealous of the Spin Fishers. Figure out how you can replicate or in some cases improve upon the lures they are using. There is a definite satisfaction in this aside from catching more Bass, and that is beating the "Bass Pro's" at their own game!

Hook: Gamakatsu Offset Shank EWG Worm Hook sz. 2/0
Thread: Black UTC 140
Eyes: Red Lead Dumbell
"Wing"/Tail: Black Rabbit Zonker
Body: UV Black Estaz
Legs: Brown Round Rubber
Collar: Black Schlappen


The Result:


Tuesday, July 9, 2013

Heptageniidae Nymph Pattern

This pattern is about as realistic as I care to tie. It's a generic Heptageniidae or "Flat Headed" Mayfly Nymph I put together. These nymphs are common in practically every stream I've sampled and with 500 or so species they are no doubt an important food source for Trout. They are purpose built for crawling around rocks along the stream bottom. However, unlike other species of Mayfly Nymphs such as Baetidae they are poor swimmers and one misstep while crawling around in the current means a helpless snack for a hungry fish (That's not to say plenty Baetis don't get gobbled up!)  I had bought some extra small mono eyes last year for some Caddis Pupa I was tying and figured I could come up with some Mayfly Nymphs that could use them as well. I usually use this pattern as a dropper in tandem with a heavier more generalized nymph. I normally don't worry too much about details like eyes and such when developing my flies but it's fun to experiment at the vise. You may buy something at the flyshop and have only a vague idea ,or none at all, of what to use it for but once you start tying you'll be surprised what you can come up with. Have fun and experiment, therein lies the beauty of Fly Tying!

Hook: Tiemco 3761 sz.14
Thread: Dark Brown Uni 8/0
Tails: Moose Body Hair
Abdomen: Brown Scud Back ( I usually trim the 1/8 strip in half when wrapping bodies)
Rib: Brown UTC Ultra Wire sz. small
Wing Case/Head: Mottled Oak ThinSkin  (Underside colored with Brown permanent marker)
Thorax/Head: Brown SLF Squirrel
Legs: Brown Speckled Hen Saddle ( Tied over the thorax style)
Eyes: Spirit River Black X-Small Mono Eyes


Friday, June 28, 2013

Hackle Stacker Damselfly


My well earned vacation starts this coming Monday and I'll be kicking it off with a float trip down one of Maryland's famed Smallmouth Rivers, The Monocacy Scenic River. Aside from getting my gear in order and getting the boat setup I've also been tying lots of flies. I've tied a few dozen poppers, divers, and surface sliders as well as meaty streamers and plenty of crayfish to round out the standard Smallie menu. However I've also come up with a few new patterns to test out and this adult Damselfly is one I can't wait to try. It's nothing groundbreaking as far as fly design goes but I figured it deserved a post if only because Damselflies don't get the same respect from Fly Fisherman that other winged insects do. At any rate I'll let everyone know how it works out. It reminds me of when I started tying flies by fashioning a pair of vise-grip pliers into a makeshift vise and wrapping all manner of craft store feathers to whatever hook I could find with sewing thread. I had just finished tying what I thought were some great flies. I showed them to another angler while we waited out a rain shower under a bridge. "What do you think of these?" I asked him. He replied in monotone "Well, they're bound to catch something." Tight Lines!

Hook: Gamakatsu B10s sz. 6
Thread: Uni 6/0 in Doctor Blue
Abdomen: Light Blue 2mm Craft Foam (Feel free to use pre-made Damselfly bodies if you prefer not to make your own)
Wing: White Sparkle Organza 
Post/Loop: Strip of Light Blue 2mm Craft Foam
Hackle: Grizzly tied "Para-Loop" style
Thorax: Wapsi Life Cycle Nymph Dubbing in Peacock ( The best synthetic Peacock dubbing as far as I'm concerned)
Eyes: Large Black Plastic Bead-Chain


Wednesday, June 26, 2013

Easy Cricket For Trout and Bluegill

In keeping with the easy to tie terrestrial theme I started with my Beetle pattern a few posts back here's a Cricket I came up with many seasons ago. I ran across it this week while digging out my summer box. For as simple and unobtrusive as it is it's profile is realistic enough to fool plenty of fish. With a few minor modifications it can also be made into an adjustable strike indicator! I promise it will catch more fish than your Thingamabobber!

Hook: Tiemco 100 sz.12
Thread: UTC 70 in Black
Tails: Black Goose Biots
Body: Black Hare's Ear or Synthetic Peacock Dubbing.
Overbody/Head: Black 2mm Craft Foam
Wing: Black Deer Hair (Sparse)
Legs: Brown Round Rubber
Sighter: Bright Colored McFly Foam


Sunday, June 23, 2013

Parachute Sulphur Emerger

Two emerger patterns I absolutely love are the "Shucked Up" emerger from Rich Strolis and the "Half & Half" emerger by Henry Ramsay. I took what I like about each pattern and came up with this simple parachute pattern shown here in a Sulphur configuration. However, the tier need only vary the size and color to imitate any Mayfly species. Also, I have tied this pattern on a heavy wire scud hook instead of a light wire version. People automatically assume since the fly is meant to float they must use the lightest hook possible. Although this may be true for some patterns this pattern benefits greatly from a slightly heavier hook which acts as a keel. This insures that the hook rides properly with the wing and hackle on the surface and the abdomen and shuck dangling below. I've also added a small black wire rib (hard to see in the photo) which adds segmentation, durability, and a little extra weight. 

Hook: Grip 14731
Thread: Uni 8/0 in Yellow
Shuck: Brown Zelon
Body: Brown Zelon
Rib: Black UTC Ultra Wire size Extra Small
Thorax: Fly Rite Poly Dubbing #38 Pale Watery Yellow
Wing Post: Gray Poly Yarn (I prefer CDC for smaller patterns)
Hackle: Light Dun


Bullethead Snowshoe Caddis

This is a style of fly I've been toying around with for the past couple weeks. A few issues back Fly Tyer magazine had ran an article about a new way of hackling your dry flies. This method involves winding the hackle in the usual "Catskill" style then separating the fibers top and bottom with strips of foam. So I came up with this adult Caddis borrowing bits and pieces from other patterns I've tied. The hackle is CDC separated on top with the bullethead style wing and the bottom with a strip of tan Razor Foam. It's been a great pattern for slower glides especially in smaller sizes when everyone else insists on fishing an Elk Hair or Henryville.

Hook: TMC 100 sz.14-20
Thread: UTC 70 in Tan
Abdomen: Tan Turkey Biot
Hackle: WoodDuck dyed CDC
Wing: Tan Snowshoe Rabbit
Bottom "Thorax Cover": Tan Razor Foam


Thursday, June 20, 2013

Articulated Concoction

Sometimes I get tired of tying small flies. Every once in a while I wanna tie up some meat! I pull out the Schlappen and Marabou and "Get Gnarly" at my vise. I don't always know exactly what I'm going to end up with either. This pattern is the result of one such "Let the Fur Fly" type of tying session. I've probably said this before but one reason we tie our own flies is the freedom to experiment with materials and techniques, and change existing patterns to suit our own aesthetic or develop new ones. So here's an articulated streamer I literally threw together letting the materials be my guide.

Rear Portion:
Hook: VMC Flippin' Hook sz. 2/0
Thread: Uni 6/0 in White
Top/Tail: Chartreuse Zonker Strip
Bottom: White Zonker Strip palmered forward
Flash: Silver Krystal Flash (2 strands per side)
Collar: White Schlappen

Front Portion:
35mm Articulated Shank
Body: Pearl Estaz
Hackle: Large Grizzly Saddle
Flash: Silver Krystal Flash
Wing: Chartreuse Zonker Strip
Eyes: Yellow Lead Dumbell
Head: Grey Senyo's Laser Dub (colored with black permanent marker)


Snowshoe Caddis Emerger

At night I usually sit in my backyard and read, write, and most importantly bug watch. I patrol around the various lights to see what insects have been drawn to their glow. It's been a great way for me to tell what flies to tie and what patterns to bring along for the next days fishing. Also, it affords me the opportunity to collect specimens which I keep on my tying desk for reference. I can always count on Midges buzzing around and have been bombarded by huge Chironomids on more than one occasion. About a month or so ago I started seeing Caddis and they've been arriving nightly ever since. They range in size from 14-18 and vary in color from creamy tan to amber brown. So armed with my reference specimens I hit the tying desk and this pattern, a variation of the "Clown Shoe Caddis" is one of many I've come up with. Enjoy!

Hook: Curved Shank Emerger sz.14 
(shown is a Grip 14731)
Thread: Uni 8/0 in Tan
Shuck: Tan Zelon
Abdomen: Clear Midge Stretch Tubing
Wing: Tan Snowshoe Rabbit 
Thorax: Blend of Tan Hares Ear, Natural Squirrel, and Tan Antron
Hackle: Brown (Trimmed on bottom and top)
Sighter: Orange and Florescent Red Poly Yarn


Tuesday, June 18, 2013

Easy Beetle For Trout and Bluegill


I think this is the longest I've gone without posting so here's a quick and easy terrestrial pattern. I'm starting to see quite a few Beetles around so it's just a matter of time before we can start throwing some foam. I had success with this pattern last season fishing for Hybrid Sunfish ( Great fun on a 3wt. ) , and also for Trout, fishing it by itself or using it as an indicator to suspend a small nymph or midge. It uses one of my favorite materials UV Micro Polar Chenille for the underbody that creates a buggy come eat me UV sheen. I've also done well with a smaller version (sz.16/18) that uses Montana Fly Company's Centipede Legs (Great Product!). Tie some up and catch the "Biggest Little Bluegill" in the pond or fool some Trout looking for a crunchy summertime snack!

Hook: Tiemco 100 sz.14
Thread: UTC 70 in Black
Underbody: Black UV Micro Polar Chenille
Overbody: Black 2mm Craft Foam
Legs: Brown Round Rubber
"Sighter": Small strip of Chartreuse 2mm Craft Foam


Tuesday, June 4, 2013

Foam Body Poly Humpy (Say that 3 times fast!)

Have you ever been Nymphing and had a trout come up and eat your indicator? I have! I remember the first time it happened I was Nymphing a usually very productive slot where the river makes a sharp turn. I had caught a handful of decent fish there a few days earlier. After probably ten or more perfect drifts I was about to give up, figuring the poachers had been through and taken the fish. I made one last cast and without warning a beautiful brown rose from the depths, grabbing my white Thingamabobber in a "Toilet-Bowl Flush" rise usually reserved for helpless terrestrials! I toyed with the idea of strapping the indicator to a hook with some tippet material stream side but decided to move on having learned a valuable lesson. Since that day I always carry some fluffy buoyant dries with me to use as indicators. Specially tied foam "Indicator" flies are also popping up in Fly Catalogs and on the Internet but I do just fine with high floating Mayfly, Caddis, and Terrestrial imitations. For more information on rigging and fishing indicator dries I highly recommend reading "Fishing Tandem Flies" by Charlie Meck, and "Dynamic Nymphing" by George Daniel. 

Hook: Tiemco 100 (sz.14 shown here)
Thread: Uni 8/0 in Tan
Tails: Moose Body Hair
Body: Tan Razor Foam (when wrapping foam try to push it around the shank instead of stretching it tight, stretching the foam reduces it floatability)
Wing/Shellback: Grey Poly Yarn
Hackle: Brown and Light Dun Whiting 

Monday, June 3, 2013

"Nymph-Head" Woven Caddis

I have a bunch of these "Nymph-Head" brand tungsten beads laying around and honestly I rarely use them. They are advertised as being the heaviest tungsten beads on the market and come in a variety of buggy colors with little eyes on the side that really stand out when colored with a permanent marker. I usually opt for standard tungsten beads in black, gold, silver, and copper. But during a tying session of Woven Nymphs I remembered I had the "Nymph-Heads" in a Caddis type green and figured what the hell. A garden variety bead would work just as well but one reason we tie our own flies is the freedom to customize and change them. Sometimes to suite specific water conditions or a particular local hatch, and other times for purely esthetic or artistic reasons. If you see these beads in your local shop and have a little extra cash left over grab a pack. You may not have a pattern in mind for them when you do but once the creative juices get going at the vise I'm sure they won't go to waste.

Hook: Partridge CZ sz.16
Thread: Olive or Chartreuse Uni 8/0 for the abdomen, Black Uni 8/0 for the thorax
Bead: 1/8th in. "Nymph-Head" tungsten bead in Caddis Green, color eyes with black permanent marker
Underbody: 3 layers Veniard Lead Foil tapered
Rib: Chartreuse UTC Ultra Wire size small
Abdomen: DMC Embroidery Floss, Dark Brown for top, Chartreuse Green for bottom, woven with an Overhand Weave
Thorax: Black Hare's Ear spun in split thread dubbing loop
Collar: Peacock Ice-Dub brushed out

Sunday, June 2, 2013

"Crawl-Dad" Jig Pattern

The weather is heating up here in Maryland and so is the fishing for Bass and Carp. Around the time we're putting air-conditioners in the windows I know it's time to give the Trout a rest for a while and go visit my other finned friends in the lakes and reservoirs. I've already been out for Smallmouth and Largemouth with good results but Carp will be on my mind, and hopefully the end of my line, in the coming weeks. I developed this simple pattern with river Smallies in mind but I'll certainly be tossing in to the Carp as well. When water temperatures get in the high 60's and 70's these bugle lipped bonefish will start to make their way from the main reservoirs into the shallower outskirts to spawn. I've always had my best luck targeting the fish on their way to spawn,and then again after they've spawned. It's not worth fishing them if their in the middle of spawning however it is a sight to behold, imagine a mosh-pit in shallow water! So tie a few of these guys up in different sizes and colors and crawl them or hop them along the bottom.

Hook: Jig Hook ( Any make or model will do, use your favorite, but make sure it's strong and sharp!)
Thread: UTC 140 in Rusty Brown
Eyes: Lead Dumbell
Body/Head: Wapsi Buggy Nymph Yarn in Crawdad Orange
Hackle: Brown Schlappen
Tail/Wing: Crawdad Orange Zonker Strip
Legs: Barred Rubber

Tuesday, May 28, 2013

Smallmouth Snack Articulated Sculpin

Here's another Articulated Sculpin pattern for Smallies and hungry Trout.
I got out this weekend for my first Smallmouth specific trip of the season. This pattern was a great producer along with a single hook version and my Simple crayfish from a previous post. I concentrated on deep pools and undercuts, swinging the flies deep. Smallmouth are a true gamefish and unlike Trout that live in very specific streams and rivers, I will almost bet most people have a decent Smallie spot nearby. Enjoy!

Rear Portion:
Hook: VMC Flippin' Hook sz. 1/0
Thread: Uni 6/0 in Olive
Tail: Black Barred Olive Marabou
Hackle: Black Schlappen
Body: Olive Crystal Chenille
Collar: Olive Schlappen
Front Portion:
Flymen Fishing Company 35mm Articulated Shank
Tail: Black Barred Olive Marabou, Work it around the shank to cover articulation point
Hackle: Black Schlappen
Body: Olive Crystal Chenille
Legs: Barred Rubber Legs
Collar: Olive Schlappen
"Wing": Sculpin Olive Sculpin Wool, Reverse tied and folded back, then "Barred" with permanent marker
Pectoral Fins: Sculpin Olive Sculpin Wool, "Barred" with permanent marker
Head: Olive Sculpin Helmet sz. small

"Lead" Zepplin Caddis Larvae

Like the band here's a Caddis that "Get's Down." It's great in a multi-fly Czech rig and equally effective by itself under an indicator. It's tied on a Partridge CZF size 14 which is really a size 10 in US hooks. Also, because of this hooks fine diameter wire I'm able to pack lots of lead onto the shank while still maintaining a fairly slim profile overall.

Hook: Partridge CZF sz. 14
Thread: UTC 70 in Fluorescent Chartreuse for the abdomen, and Uni 8/0 in Black for the thorax and head.
Underbody: Veniards Extra Fine Flat Lead, three layers tapered.
Abdomen: Jan Siman Magic Shrimp Foil in Light Olive, tied shiny side down so shiny side faces up when wrapped.
Rib: 5x Mono
Thorax: Black Ostrich Herl. Wrap herl and stroke fibers on top down, coat the top of thorax and head with Liquid Fusion (shown here) or any UV cured adhesives. Look up JC's Electric Caddis, the thorax is created the same way.
Extras: Brown Permanent Marker to color Abdomen.
Notes: Try not to wrap the Shrimp Foil too tight or your segmentation won't be as pronounced when your mono rib is wrapped.


Sunday, May 26, 2013

Along Came Two Spiders ( A Pair of Soft-Hackles)

I tied these two little flies last night. I won't go into the history of Soft-Hackle flies but I can attest to their effectiveness still today. I've caught everything from Trout, to Carp, to Panfish on wet flies of some kind or another. Although they can be tied to imitate specific insects, some of the best patterns are those that are the most suggestive. When I studied figure drawing at the Maryland Institute College of Art I learned the importance of capturing the "essence" of the subject through a quick sketch or "Gesture" drawing rather than get caught in the details. Wet Flies and traditional Soft Hackles are "Sketches" of potential food items for the fish. There's just enough information there to suggest life, and a possible meal for a hungry fish. I highly recommend giving them a try if you haven't already. Also, from a tying standpoint there is quiet beauty in their simplicity. They are easy to tie as well making them excellent for new tiers out there. If your in Maryland and want to know more about Soft-Hackle Flies or need the materials to tie them (some of which are hard to find) I highly recommend stopping in Great Feathers located near the Gunpowder River.

Left Fly: 
Hook: Tiemco 3761 sz.16
Thread: Uni 8/0 in Yellow
Body: Turkey Biot dyed Sulphur Orange
Thorax: Fly Rite Poly Dubbing in Pale Watery Yellow tied very sparsely in a split thread dubbing loop
Hackle: Hungarian Partridge

Right Fly:
Hook: Tiemco 3761 sz.18
Thread: Uni 8/0 in Olive Dun
Body: Stripped Peacock Quill (Polish Quill) dyed Olive
Thorax: Nature's Spirit Emergence Dubbing in Blue Winged Olive tied very sparsely
Hackle: Small grey feather from a Pigeon ( I find them on the street!! )

Saturday, May 25, 2013

Quigley Inspired Sulphur

In keeping with the "Para-Loop"/"Hackle-Stacker" style of fly, here's one for the Sulphur hatch. I've found myself tying this style of fly a lot lately, not only because they look great, but I guess it's my own personal way of keeping Mr. Quigleys memory alive on the water. Unfortunately we lost him a while back but the body of work and innovative flies and tying techniques he left behind live on. That being said, I had his "Sparkle-Flag" pattern in mind when I was tying this. It's a pattern to try when the Trout have seen everyone else's Sulphur Duns and it just might trick those fish who want to see something different when they look up from their watery lair. Happy Fishing!

Hook: Tiemco 100 Size to Match Natural ( sz.14 shown here)
Thread: Yellow Uni 8/0
Tails: Microfibbets (I typically use 4 for sz. 14's and up, and 2 for sz.16 and smaller)
Abdomen: Turkey Biot dyed Sulphur Orange (coated with Veniard Cellire Varnish)
Post/Loop: 5x or 6x Mono
Hackle: Light Dun
Thorax: Fly Rite Poly Dubbing in Pale Watery Yellow
Wing: Light Dun CDC Plumes

Thursday, May 23, 2013

New Warmwater/Big Trout Combo, Thanks Tax Refund!

For the past couple years I've fished exclusively with an 8 1/2 ft. 5 wt. and a 7 1/2 ft. 3 wt. For the small Piedmont and Freestone stream Trout fishing I do most of the time these two rods are all I need. For Bass, Carp, and river Smallmouth I would usually over-line my 5wt. with a 6wt. line, but there's only so much you can do with such a set-up. Lately I've found myself under gunned as the fish I encounter are larger and the flies I use to trick them bigger. So I decided this season to put together a dedicated big fish/big fly combo with my Tax Refund. I searched around for a while until I settled on the Temple Fork Outfitters Mini-Mag. There are two rods in the Mini-Mag series, a 6-8wt. and a 8-10wt. Both are 8  ft. 3 piece rods. I chose the 6-8wt model and couldn't be happier. Although I might not win any distance contests casting it, I am confident in it's ability to cast heavy wind-resistant flies and muscle in the big fish that eat them. For a reel I went cheap  and chose the Bass Pro Shops Hobbs Creek Large Arbor. It's basic, reliable, and the money I saved buying it left me with enough to grab two spare spools. I loaded them up with a WF 6, WF 7, and kicked it old school spooling the reel up with a Cortland 333 HT 8wt. Bass Taper! I also have to mention Bears Den who I bought the rod from. They were the only shop I called that had the rod in stock. They boxed it and sent it out the same day I ordered it. It arrived a few days later and I was fishing! I highly recommend them and look forward to shopping with them again! Also, it's not a bad idea to cast a heavier rod now and again, especially if your used to 5wt's and under. Any casting flaws you have show up in a big way! Tight Loops!

Wednesday, May 22, 2013

"Skittish Crayfish" Variation

Here's another crayfish pattern I'm working on. It's a spin-off of the Skittish Crayfish, an easy to tie and very effective crayfish imitation I became aware of in a past issue of Fly Tyer. I've made some slight adjustments to the original pattern which make it a little easier to tie I think. The original pattern uses Squirrel Tail for the claws and a Zonker strip for the legs and underbody. I use Zonker Strips for the claws instead of tying in a clump of Squirrel Tail, dividing it, then posting the two clumps to form the claws. I use Schlappen for the legs instead of a Zonker Strip mostly because I like the way it looks. My version also doesn't include a wire rib through the body but it doesn't hurt to add one. I've found after coating the Moose Hair shellback with CCG, Bug-Bond, or Liquid Fusion the fly is plenty durable. In smaller sizes I like to fish it dead drift, and larger sizes I like to fish on a sink tip, stripping it along the bottom and shaking it whenever I feel a rock or log. Tie a few up in sizes 8-4 and get fishing!

Hook: Streamer hook sz. 8-4 (The fly in the picture is tied on a Mustad R74-9672)
Thread: UTC 140 in Rusty Brown
Eyes: Lead Dumbell (Painted or Unpainted)
Claws: Crawdad colored Zonker Strips (Mottled with brown permanent marker)
Antennae: Brown Round Rubber
Head/Body: Crawdad Orange Wapsi Buggy Nymph Yarn
Legs: Brown Schlappen
Shellback: Moose Body Hair coated with epoxy, Bug Bond, CCG, or my favorite Liquid Fusion

Monday, May 20, 2013

A Little "Rusty" With My Spinner Tying

I'll admit I'm not too much of a dry fly fisherman. Probably when I get older into my golden years I'll re-discover the art of fishing a dry fly. But while I'm young and reckless I'm gonna nymph! Every once in a while I'll fish dries though, especially when the major hatches of the Eastern USA get going. One of the best times to fish a dry is during the spinner fall. If you had to choose only one pattern in one size to fish you would have to start with a size 14 Rusty Spinner. Everyone has their own version of this pattern and here's the one I use. It floats well and is easy to see.  Enjoy!

Hook: Tiemco 100 sz.14
Thread: Rusty Brown Uni 8/0
Tails: Microfibbets (For a size 14 I use 4 and split them leaving 2 on each side)
Abdomen: Rusty Brown Turkey Biot ( I almost always coat the Biot body with Veniards Cellire Varnish or Super Glue for durability and shine)
Wings: Light colored Snowshoe Rabbit, Natural Cream or Light Dun work fine
Thorax Cover: Yellow Craft Foam
Thorax: Rusty Brown Antron

"Attract"-ive Caddis Point Fly

Last year around this time I had one of my best days Nymphing a seldom fished stretch of Morgan Run. Me and my father had fished it a few days earlier and we were surprised to find so many Browns this far away from the more popular pools and glides that get hammered day after day. These fish however were somewhat wiser than the rest of their stocked brethren placing themselves in strategic lies right out of a book on "Reading The Water". The stretch was classic pocket-water and in order to be successful I would need to ditch the indicator, read the currents, and use a fly that would plummet to the bottom. I plucked a size 14. Czech Catnip from the box and began brushing up on my Tuck Cast. I could see the trout darting back and forth rhythmically feeding in his "Prime-Lie", taunting me. Finally I dropped my nymph a little farther upstream in a seam I hadn't tried yet, and as if propelled by a conveyor belt I watched 
as it shot right into the fishes lie! He took my nymph and the rest is history as they say. I've since developed this pattern for similar situations. Although the Czech Catnip still gets plenty of use I've found this pattern sinks a little quicker thanks to the slim profile created by the Embroidery Floss abdomen. And since the trout may only have seconds to decide whether to eat the fly or not, the segmentation the materials create is enough to convince them...Sometimes!

Hook: Partridge CZN sz.14-16
Thread: Olive Uni 8/0
Bead: 1/8th inch Black Tungsten
Underbody: Two layers Veniard Extra Fine Flat Lead
Abdomen: DMC Embroidery Floss Chartreuse
Inner- Rib: Sz. Small UTC Ultra Wire Chartreuse
Outer-Rib: 5x Mono
Shellback: Olive ScudBack
Thorax: UV Black Micro Polar Chenille
Extras: Olive and Brown Waterproof markers to "Mottle" shellback


Thursday, May 9, 2013

Articulated "Scrap Pile" Sculpin Pattern

I threw this guy together last night with bits and pieces from the scrap pile on my tying desk. I have gotten myself in the habit of saving all the cut ends and little bits of feathers and materials that would otherwise end up in the trash. Alot of people start tying flies under the misconception that it's cheaper than buying them, it's really not. Especially if you tie as much and as many flies as I do! Whether your tying flies to sell, or just for yourself I encourage you to be frugal with your materials. Enjoy!

Rear Portion:
Hook: Any 4x Long Straight Eye Streamer Hook (with a large enough eye to accept the articulated shank) sz. 4-6
Thread: Olive UTC 140 
Tail: Black Barred Olive Zonker Strip
Body: Black Barred Olive Zonker Strip (cross-cut if you got em')
Collar: Black Schlappen
Front Portion:
35mm Articulated Shank
Thread: Olive UTC 140
Body: Black Barred Olive Zonker Strip
Wing: Clump of Sculpin Olive Sculpin Wool (reverse tied then folded back)
Legs: Rubber Legs (I use old jig and spinnerbait skirts)
Pectoral Fins: Brown Hen Saddle Feathers
Collar: Black Schlappen (I used olive here but meant to use black)
Head: Olive Sculpin Helmet Size Small


Wednesday, May 8, 2013

Para-Loop Light Hendrickson

Here's a Para-Loop style or "Hackle-Stacker" type Light Hendrickson I tied up. Instead of using standard hackle I opt for CDC instead. Not only does it look better I think, leaving a beautiful footprint for the trout, but it also makes this style of fly easier to tie. After preparing the CDC with either the Marc Petitjean Magic Tool or Bull Dog clip simply split your thread and insert the fibers. After that, spin your thread like you would a dubbing loop and wrap up and back down your mono post. A search on YouTube for Hackle Stacker or Para-Loop Fly Tying yields lots of tying videos that will explain this method of hackling your flies better than I can. It's a great technique to have in your tiers bag of tricks and can spice up not only your Mayflies but your Caddis, Midges, and Terrestrials as well.


Hook: Tiemco 100 sized to match natural
Thread: Uni 8/0 in Rusty Brown
Tails: Microfibbets
Abdomen: Turkey Biot dyed Hendrickson
Post/Loop: Mono
Hackle: CDC dyed Wood-Duck
Thorax: Tan Hare's Ear
Wing: Gray Poly Yarn

Tuesday, May 7, 2013

Czech Nymph Using New Caddis Backs From JSON Sweden

Fly tiers of today have at their disposal a dizzying array of materials with which to craft flies. From genetic hackle to ultra-realistic synthetics we're able to tie flies our forefathers would have loved to have had in their boxes. One such company producing these ultra-real materials is JSON Sweden. From wing materials that make your mayflies look as though they can take flight to legs and bodies that make your nymphs look like they might crawl out of your box, they have it all. I personally think some of their patterns are better suited for a frame than the trout stream but when I saw their Caddis Backs I had to see what they could do for one of my Czech nymphs. In the end it's the Trout's opinion that matters and a standard pattern still works just as well. But it's fun to experiment with all the new stuff that's available to us and if you have a little extra money pick some up!

Hook: Partridge CZF sz.14
Thread: Olive Uni 8/0
Underbody: 3 Layers Veniard Lead Foil
Shellback: JSON Caddis Back size small
Rib: 5x Mono
Body: 4 Part Blend of Caddis Green Ice Dub, Caddis Green Hare's Ear, Green Antron, and Mint Antron
HotSpot: Big Horn Pink Wapsi Sow-Scud Dubbing
Thorax: 2 Part Blend Black Hare's Ear, and Dark Stone Antron
Extras: Green and Black Permanent Marker to Color Caddis Back


Another Bellyache Minnow Variation

     Here's another variation of the Bellyache Minnow. It has almost replaced the Clouser Minnow as my go-to baitfish imitation when chasing Bass as well as Trout. Notice I said "Almost" as the Clouser still has a few dedicated rows in my streamer box. But the Bellyache Minnow really shines in the water. The original pattern uses one of Hareline's Ribbed Tungsten Scud Bodies to turn the shank over inverting the hook. I use dumbell eyes instead which not only assure the fly rides hook point up, but combined with the Zonker strip tail, give the fly a great jigging action when bounced along the bottom.

Hook: Gamakatsu B10S sz. 4-6
Thread: White Uni 6/0
Eyes: Small Lead Dumbell
Tail: Pearl Ice Dub (straighten the fibers and tie them on top of shank)
"Wing": Black Barred Olive Zonker Strip
Body: Pear Ice Dub (spun in dubbing loop and combed out)
Head: Ice Dub Minnow Belly (spun in dubbing loop, combed out, and blended into body)


Monday, May 6, 2013

My Most Productive Jig Nymph

     CDC is an almost magical material among fly tiers. If it weren't from a regular old duck, from around it's butt nonetheless, we might imagine it coming from some mythical creature. It is prized for it's floatation capabilities which are often falsely attributed to Preen Oil from the ducks Preen Gland. In actuality it's the structure of the feather itself and it's many tiny filaments that make it so buoyant. It just so happens that these attributes also make it look great underwater and maybe even better than it does floating on top.
     Lately I've been using more and more Snowshoe Rabbit in my dry fly patterns that before called for CDC. And rather than let all that CDC go to waste I've been incorporating it into my nymphs, wet-flies, and even small streamers (see my post on the Bastard Bugger). The jig nymph below is one such example of this. It's one of those patterns that makes me wonder why I carry hundreds of flies with me when I fish. It's one of those "confidence flies" we hear people talk about, for me anyway. I know it will catch fish and because of that I spend my time on the water focused on "how" I'm fishing instead of "what" I'm fishing. Tie a few up!

Hook: Umpqua C400 BL sz.14
Thread: Brown Veevus 16/0
Bead: 7/64th Slotted Gold Tungsten
Tails: 3 Fibers of Moose Body Hair Split
Body: Brown D-Rib
Thorax: Brown CDC Spun In Dubbing Loop
Wingcase: Black UTC Flashback Tinsel
Collar: A Pinch Of Brown SLF Spikey Squirrel (Just enough to cover up excess thread wraps from tying off the dubbing loop and wingcase)


The Big Minnow That Can (Catch Fish)

Here's an articulated baitfish pattern using the new articulated shanks from Flymen Fishing Company. When using these shanks to tie "trailer hook" style articulated flies, like the one I'm about to show you, it is important that you use a straight eye hook with a large enough eye. Frustration from not being able to find such a hook, and being at least 30-45 minutes away from a flyshop, led me to my local Dick's Sporting Goods one evening to find one that would work in a pinch. Anyone who is familiar with some of the flies tied by Jim Misiura knows that all kinds of hooks meant for spin fishing work great for fly tying. So it was with this "think outside the box" mentality, and a sample shank to test fit, I made my way into the hook isle. I ended up purchasing a pack of the "Flippin" hooks from VMC and so far so good. These hooks do require slight modification however. They come with a plastic bait keeper molded around the shank which must be removed. A pair of pliers or hemostats makes quick work of breaking it off. Just grip the plastic with the pliers and twist the hook being careful to not bend the shank. Once it's removed there is also a small barb used to keep the plastic on that must be mashed down. Happy tying!

REAR PORTION:
Hook: VMC "Flippin" hook sz. 1/0
Thread: White Uni 6/0
Tail: Grey Zonker strip
Body: Pear Estaz
Hackle: White Schlappen
Palmer the Schlappen through the body making sure to get a few turns of the fluffier fibers, at the base of the feather, up front.

FRONT PORTION:
35mm Articulated Shank
Thread: White Uni 6/0
Body: Pearl Estaz
Hackle: White Schlappen
Wing: Grey Zonker Strip
Eyes: Lead Dumbell
Head: Grey Senyo's Laser Dub

Sunday, May 5, 2013

The Little Minnow That Could (Catch a Fish)

Here's a quick baitfish pattern I came up with more or less to get acquainted with Senyo's Laser Dub. It's a spin-off of the Bellyache Minnow which I've become a big fan of when chasing all kinds of warmwater creatures that inhabit the little farm ponds and reservoirs around me. I have another variation of this pattern as well as a much larger articulated version to show you as well so stay tuned!

Hook: Gamakatsu B10S size 4-6
Thread: White Uni 6/0
Eyes: Lead Dumbell
Tail: Pearl Ice Dub ( Straighten the fibers and tie them on the shank like any other material )
Body: Pearl Ice Dub spun in a dubbing loop and combed out
"Wing": Grey Zonker Strip
Head: Grey Senyo's Laser Dub


Saturday, May 4, 2013

Simple Crayfish Pattern

While browsing around a local flyshop I stumbled upon a material from Wapsi called Buggy Nymph Yarn. It's a fine diameter multi-colored yarn which comes in a variety of colors. I purchased a pack of Crawdad Orange colored yarn in hopes of using it for some crayfish patterns. Well that was more than a year ago and it wasn't until recently that I came across it while organizing my tying desk. So I whipped up this pattern borrowing bits and pieces from other crayfish patterns I've tied in the past. Enjoy!

Hook: Streamer size 6-4, use a wide gape hook if possible.
Thread: Uni 8/0 in Rusty Brown
Eyes: Lead Dumbell
Claws: Rusty Brown Zonker Strips "mottled" with brown permanent marker
Antennae: Brown Round Rubber Legs
Legs: Brown Schlappen
Body: Buggy Nymph Yarn in Crawdad Orange
Carapace/Shellback: Medium Brown Antron Yarn
Rib: Brown UTC Copper Wire

Tying Notes: You may want to coat the carapace with epoxy or my favorite Liquid Fusion. A UV Light Cured adhesive such as BugBond or CCG would also work great.